By Using Copy/Trace
When tracing a new datum element, the Copy/Trace tool provides the functionality to transfer attributes from the traced feature to the new datum and automatically populate the associated Datum elements form. You must have a shapefile imported as local layers.
- Add the shapefile you want
to copy/trace from. Click the
Map Layers button
 .
.
- In the Map Layers dialog, on the Catalog tab, click the Add button.
- In the Add Layer dialog, select Shapefile as the Layer Type. Enter the Layer Name, then select the shapefile to use using the Choose File button. With the files chosen, click Upload File. Click Add.
-
Click the Start Spatial Edits button
 and select the layer you will be
working with.
and select the layer you will be
working with.
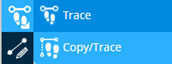
- Click the Datum
Trace button
 and select
Copy/Trace
and select
Copy/Trace
 from the menu that opens.
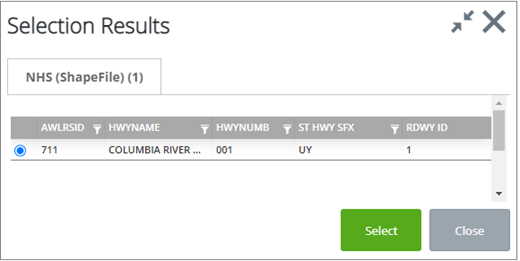
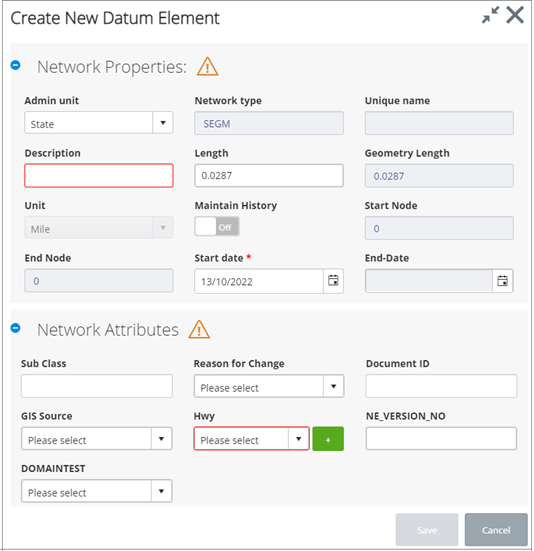
- Select the element to trace by drawing a box around it. The Selection Results dialog opens, allowing you to select the element. Click the radio button next to the desired element and click Select.
- Your cursor will now be
locked onto the selected feature to be traced. Click and drag the cursor along
the feature; when you are finished double-click to open the
Create New Datum Element dialog, where you can
enter property and attribute data. When you have finished entering data, click
Save to create the element.
The
 button you see in the screenshot,
is only displayed if the attribute is set as a reference to a parent Group. If
the parent group does not exist, pressing this button will display the
Creating Datum Group form so you can create the parent
group.
button you see in the screenshot,
is only displayed if the attribute is set as a reference to a parent Group. If
the parent group does not exist, pressing this button will display the
Creating Datum Group form so you can create the parent
group.
When all applicable fields are entered, click Save. The dialog closes and the element is created.